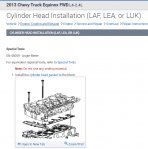
Chevrolet equinox LS 2.4L 4cil LEA 2013 - mas informacion de apoyo acontinuacion
OFF VEHICLE
Removal
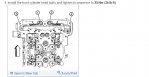
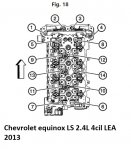
1.Remove cylinder head to block bolts in sequence as illustrated in, Fig. 18.Discard bolts.
2.Remove cylinder head. Caution: In order to prevent damage to valves and injectors during cylinder head removal, set cylinder head on blocks.
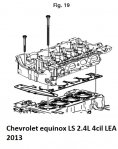
3.Remove cylinder head gasket, Fig. 19.
4.Clean all of gasket surfaces, Fig. 19.
Installation
Caution: Use correct fastener in correct location. Replacement fasteners must be correct part number for that application. Do not use paints, lubricants, or corrosion inhibitors on fasteners, or fastener joint surfaces, unless specified. These coatings affect fastener torque and joint clamping force and may damage fastener. Use correct tightening sequence and specifications when installing fasteners in order to avoid damage to parts and systems. When using fasteners that are threaded directly into plastic, use extreme care not to strip mating plastic part(s). Use hand tools only, and do not use any kind of impact or power tools. Fastener should be hand tightened, fully seated, and not stripped.
1.Install cylinder head gasket to block, Fig. 19.
2.Install cylinder head. Ensure number 1 cylinder is at Top Dead Center (TDC). Key on crankshaft should be on top in 12 o'clock position.
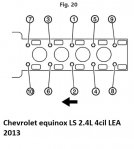
3.Install new cylinder head bolts in sequence as illustrated in, Fig. 20.
4.Torque cylinder head bolts to 30 Nm. (22 ft. lbs.), plus an additional 155 degrees turn using meter (J45059), or equivalent.
5.Install front cylinder head bolts.
6.Torque front cylinder head bolts to 35 Nm. (26 ft. lbs.)